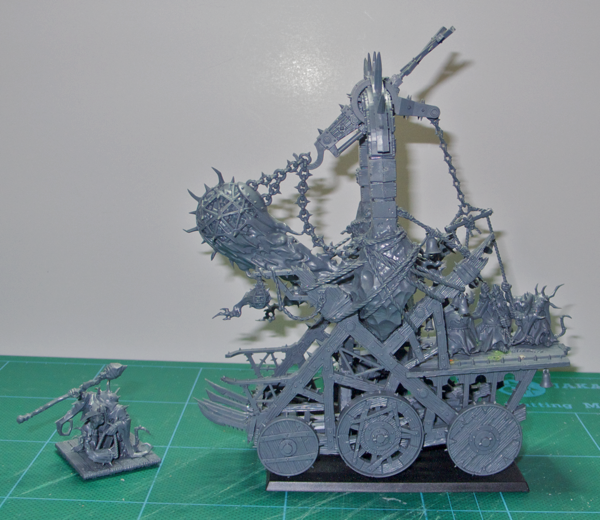
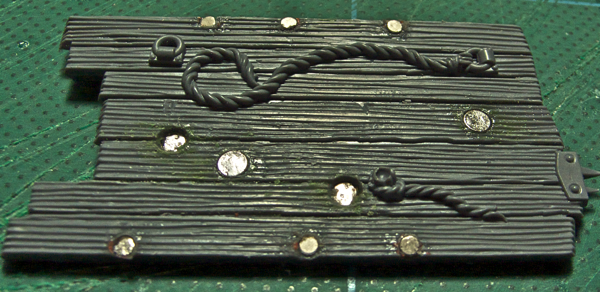
Now we're getting serious. The axle for the bell / furnace is completely removed, and replaced with 6 magnets (all 1/8" x 1/16" discs). Here is the detail:
Step 7 - glue a magnet in each half-arch's hole. You will need to make the hole a tiny bit larger, a round file comes in handy here.
Step 8 - making sure you're not getting the side wrong (a dry-fit is essential at this stage), put a magnet in each part of the yoke. Note in the pictures below which side to be flush with.

Step 9 - saw the bottom axle off and replace with two 1 x 2 mm discs (green arrow). Again make sure you get the magnets' sides right.

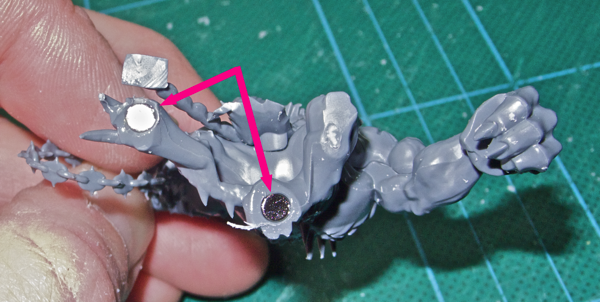
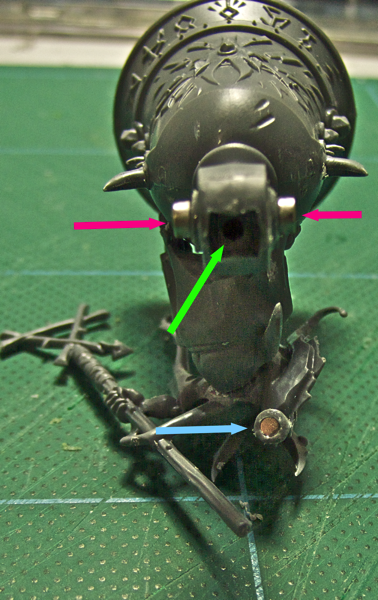
Steps 10, 11 and 12: glue two 1/8" x 1/16" magnets to either side of the bell's axle, having sawn the axle off first (pink arrows at the top). Drill a hole into the bell's top and insert a 1 x 2 mm magnet (green arrow). Finally, drill a hole in the Grey Seer's arm and insert a 2 x 0.4mm magnet in there (blue arrow at the bottom).
Step 13: drill a hole in the Grey Seer's hand and insert a 2 x 0.4mm magnet.
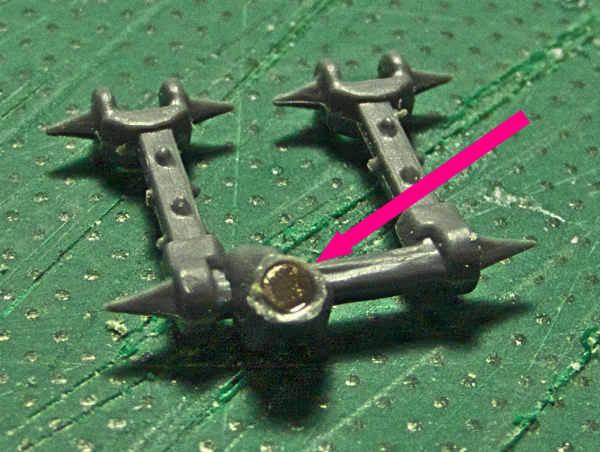
Step 14: drill a hole into the ornament and insert a 1 x 2 mm magnet.

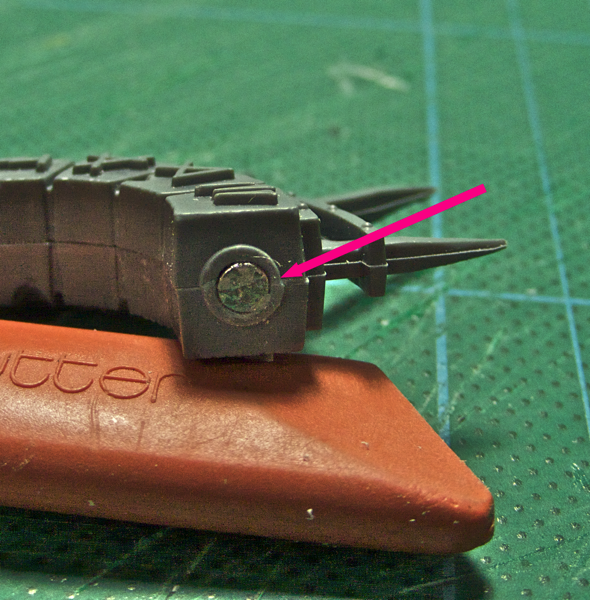
Steps 15 and 16: glue two 1/8" x 1/16" magnets to either side of the furnace's axle, having sawn the axle off first (only one is shown on the picture, there is one on the other side, pink arrow at the top). Drill a hole into the furnace's top and insert a 1 x 2 mm magnet (green arrow).

Now we're getting serious. The axle for the bell / furnace is completely removed, and replaced with 6 magnets (all 1/8" x 1/16" discs). Here is the detail:
Step 7 - glue a magnet in each half-arch's hole. You will need to make the hole a tiny bit larger, a round file comes in handy here.
.sandvox/P1020933%20-%20Version%202%20copy.png "This image is a placeholder. Drag a new media file here to replace it.")
Step 8 - making sure you're not getting the side wrong (a dry-fit is essential at this stage), put a magnet in each part of the yoke. Note in the pictures below which side to be flush with.
.sandvox/P1020927%20-%20Version%202%20copy.png "This image is a placeholder. Drag a new media file here to replace it.")
Step 9 - saw the bottom axle off and replace with two 1 x 2 mm discs (green arrow). Again make sure you get the magnets' sides right.
.sandvox/P1020928%20-%20Version%202%20copy.png "This image is a placeholder. Drag a new media file here to replace it.")
Steps 10, 11 and 12: glue two 1/8" x 1/16" magnets to either side of the bell's axle, having sawn the axle off first (pink arrows at the top). Drill a hole into the bell's top and insert a 1 x 2 mm magnet (green arrow). Finally, drill a hole in the Grey Seer's arm and insert a 2 x 0.4mm magnet in there (blue arrow at the bottom).
.sandvox/P1020926%20-%20Version%202%20copy.png "This image is a placeholder. Drag a new media file here to replace it.")
Step 13: drill a hole in the Grey Seer's hand and insert a 2 x 0.4mm magnet.
.sandvox/P1020929%20-%20Version%202%20copy.png "This image is a placeholder. Drag a new media file here to replace it.")
Step 14: drill a hole into the ornament and insert a 1 x 2 mm magnet.
.sandvox/P1020931%20-%20Version%202%20copy.png "This image is a placeholder. Drag a new media file here to replace it.")
Steps 15 and 16: glue two 1/8" x 1/16" magnets to either side of the furnace's axle, having sawn the axle off first (only one is shown on the picture, there is one on the other side, pink arrow at the top). Drill a hole into the furnace's top and insert a 1 x 2 mm magnet (green arrow).
.sandvox/P1020935%20-%20Version%202%20copy.png "This image is a placeholder. Drag a new media file here to replace it.")