April 21, 2011

Pylon – fixing the focussing array

The focussing array is them six "whiskers". I have tried a number of methods for fixing them.

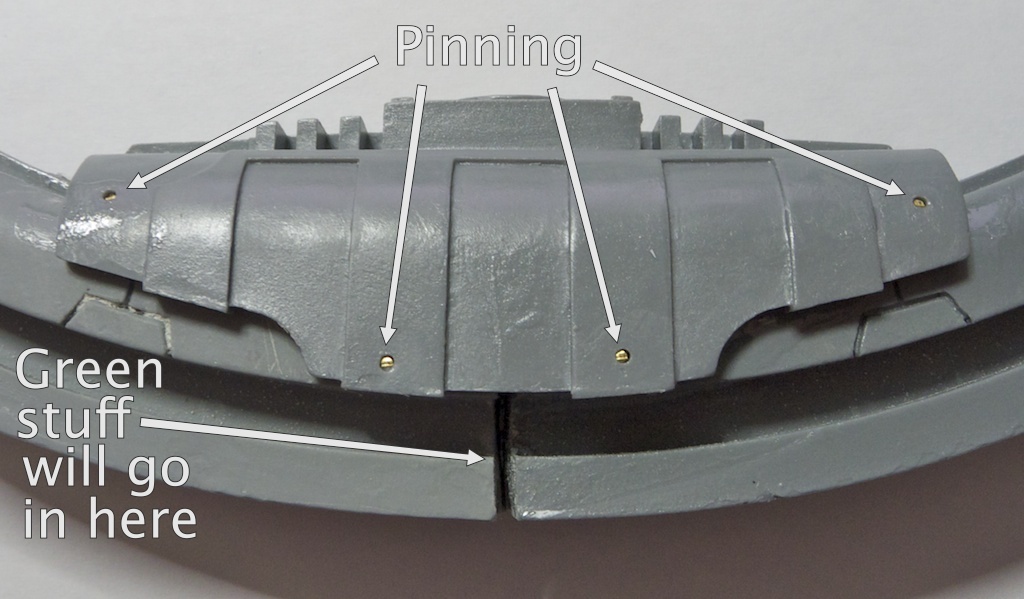
For the first pylon I built, I went with magnets (two per). Unfortunately, they were not that strong and I ended up with some droopy whiskers. So at the last moment I added a pin (that's the whisker to the left below). For the second pylon, I went with two pins and no magnets (right, below). This one makes for a sturdy link, however each time I put the whiskers on I'm a bit concerned that I'll damage the holes.

First try (left) vs. second try (right)
 
 First try (bottom) vs. second try (top)
 
 First try - 2 magnets and a hole
 
Second try - 2 holes


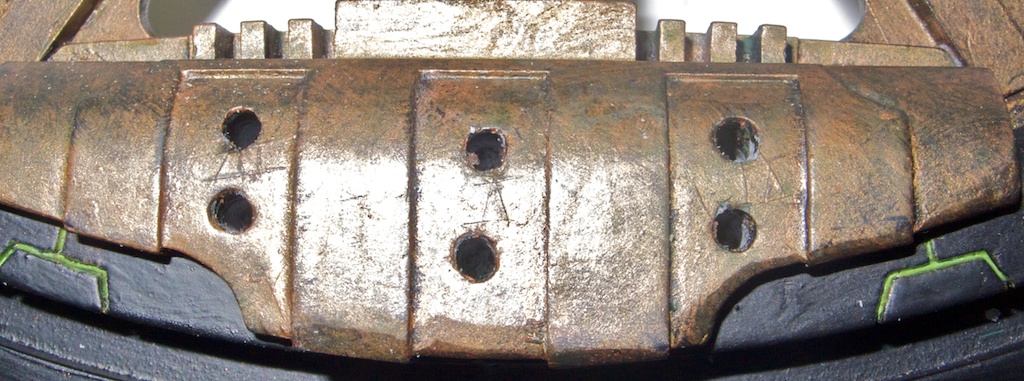
For the third pylon, I decided to go back to magnets – because if I can't magnetise something, I get that very annoying feeling that I've failed somehow. This time around however, I went with rod magnets (1/8" x 1/4"), so I get the benefits of pins as well. So far, so good…

Rod magnet, half-sunk into the whisker
 
 There are magnets inside the holes - these ones are 1/8" x 1/16".

April 20, 2011

Arac Attack!

I undercoated a bunch of scarab swarms outside this morning and then left them to dry. When I came back, they were under attack! Aw, aren't these itsy bitsy spiders the cutest little things?


It's not the first time the local arachnids have taken an interest in my Necrons. Below is a much larger critter that decided to visit my first pylon. It does look a bit drowsy (well that paint does emit some serious fumes), but went away alright in the end.


(and then people wonder why I'd rather stay inside…)

April 17, 2011

Pylon - assembling the axle

There are 3 parts to fit together. They have all been primed with Chaos Black, followed by a dry brush of Dwarf Bronze, and a light wash of Thraka Green.
 
So one of these:
 
 
And two of those:
 
 
First, I removed the extra paint so the glue bonds to the resin, and not the paint. A Dremel with appropriate bits helped here. An added advantage is that I got a rough surface, which makes for a stronger joint.
For an earlier pylon, I'd used blu-tack to mask the parts I did not want to paint, that works too.


The glue goes in the axle's groves, and the guides get prepped with a primer/accelerator (I use Filla-Glu and their very convenient Kicka-Pen).
 
 
In order not to get nasty surprises during the final assembly, I fit the pylon onto the axle while the glue dried.
 
 
One final note on pinning: tempting as it might be, do not pin. On an earlier pylon, I pinned where the arrows are in the picture below. All I got was a weaker piece, which snapped in two during my first game with it. I've stuck with just glue since, and haven't had a single problem.
 

April 09, 2011

Pylon progress

So yes, it's been a while, but at long last I've been making progress. The thing with pylons is, they're big. If you want to take them with you, you pretty much have to go flat-packed. Like so:

 
So what I've done is cut the tip of the pylon with a hacksaw, drilled some holes, and glued magnets in (in this case they're 3x2mm, ensuring a nice powerful fit).
 

On the pylon side, I drilled 3 roughly equidistant holes, glued the magnets in, waited for everything to dry, and then added a spot of paint on top of the magnets. I pressed the other part while the paint was wet, which gave me the place to drill…

 … I then drilled where the paint was, put on more magnets (taking care I got the polarity right), and here we are:

 
Here is the result, on one of my older pylons (I've managed a tighter fit this time around):


 While I was at it, I assembled the centre of the pylon: glued the 3 parts together, then added 1mm brass rod in 4 places. The rod is not flush, the idea is to fill the hole with a bit of green stuff. It was quick to do, and ensures the thing will not break apart. The joint in the middle will be filled with green stuff as well - easier than spending time trying to get the two parts fit exactly.