December 28, 2009

Magnetised Screaming Bell - Part 1 - Plague Monks & Rat Ogre

So I'd started glueing the thing together in order to do a Screaming Bell, as I thought using magnets would be too difficult, and I did not want a Plague Furnace anyway. Good thing I changed my mind while the glue was not entirely set. Anyway, here is part 1 of my adventures magnetising a Screaming Bell:

Step 1 - drill holes where the blind holes for the Rat Ogre and Plague Monks are. Make sure to note which are which. I went all the way through for convenience, the idea being to put green stuff over the magnets afterwards.

P1020900.png

Step 2 - insert the magnets. These are 1/8" x 1/16" discs, usual source.

P1020901.png

Step 3 - put a spot of paint (solar orange foundation is still my favourite for this) onto the magnets that will connect to the Plague Monks, put the Plague Monks on to get them marked, then drill holes. Note that the holes on the picture look quite ugly - this would be because I first put the magnets the wrong way round and had to force them out (when it would have been so much easier to change the magnets on the board instead, oh well…).

P1020902.png

Step 4 - magnets are in.

P1020904.png

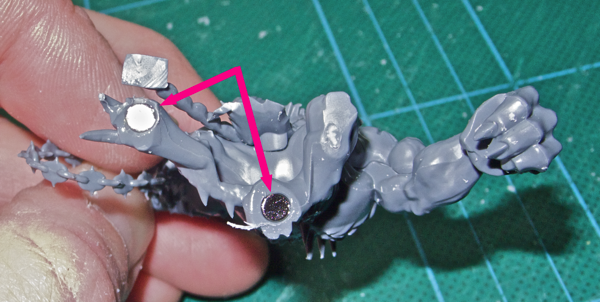
Steps 5 and 6 - do the same with the Rat Ogre.
P1020906.png

December 27, 2009

Magnetised movement trays

Before I speak about the magnetised Screaming Bell (real soon now), here is an idea I was toying with this afternoon:

I'd built four 5x4 movement trays from Games Workshop's modular tray set (they can be seen on the previous post). As the sets are originally 10x10, I was left with a 2x10 piece.

Now the Plague Monks box has got pieces in it to build Censer Bearers, however I'd already built the full 20 that came in the battalion box as standard monks. A quick pop down the shop later, I've got 20 more monks. 10 of these will be Censer Bearers, and the 10 left will join the existing 20 monks. And so to the magnetised movement tray, to cater for my growing troops.

The arrows point to the magnets, they are the 2 x 1 mm disc magnets from PowerMagnetStore.com:

Movement tray

Movement tray detail

Two pieces:

Movement tray

They snap together nicely:

Movement tray

It does hold well, I would think there is little risk of a split whilst moving the trays around on the game board:

Movement tray

December 26, 2009

Skaven

I'm having trouble getting into IG at the moment, so decided instead to concentrate on all them Skaven I'd bought back in November. All assembled, based and undercoated (although since I sprayed them on a dark and cold evening, there are some misses and quite a bit of frosting). Now onto the Screaming Bell, with magnets.

All of them critters:

All skaven

Clanrats:

Clanrats

Plague monks:

Plague monks

Stormvermin:

Stormvermin

Thanquol and Boneripper:

Thanquol and Boneripper

2 rat ogres and a pack master:

Rat ogres and packmaster

Giant rats and pack masters (I've managed to misplace one of my 6 giant rats…)

Giant rats and packmasters

Queek Headtaker and a Warlord I bought earlier this year:

Queek Headtaker and warlord

Now at some point I really ought to be looking at the rules and see what I can do with them…


I'm having trouble getting into IG at the moment, so decided instead to concentrate on all them Skaven I'd bought back in November. All assembled, based and undercoated (although since I sprayed them on a dark and cold evening, there are some misses and quite a bit of frosting). Now onto the Screaming Bell, with magnets.

All of them critters:

P1020890 - Version 2

Clanrats:

P1020892 - Version 2

Plague monks:

P1020894 - Version 2

Stormvermin:

P1020895 - Version 2

Thanquol and Boneripper:

P1020897 - Version 3

2 rat ogres and a pack master:

P1020898 - Version 2

Giant rats and pack masters (I've managed to misplace one of my 6 giant rats…)

P1020898 - Version 3

Queek Headtaker and a Warlord I bought earlier this year:

P1020897 - Version 4

Now at some point I really ought to be looking at the rules and see what I can do with them…

December 23, 2009

Leman Russ Demolisher Punisher Executioner

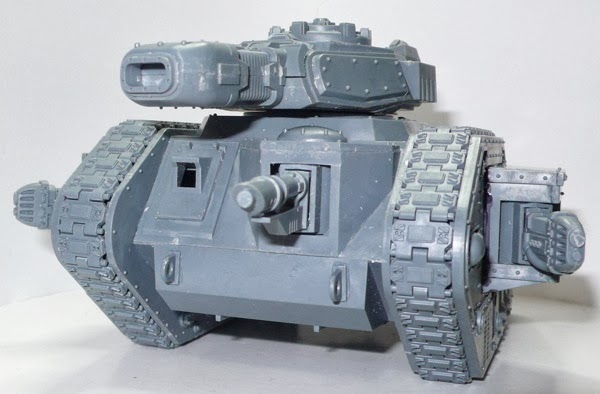
So, I've got a new toy. It's a Leman Russ Demolisher:

Leman Russ Demolisher

It's also a Leman Russ Executioner:

Leman Russ  Executioner

And, well, it's a Leman Russ Punisher too:

Leman Russ Punisher

Or to put it another way, I've been busy with magnets. As per before, I got them from http://www.powermagnetstore.com. I used 1/8" x 1/16" discs.

First I dealt with the turret: I pierced the hinge of the door, and slid a piece of .8mm brass rod in, so the top could be opened and closed. I then glued a piece of plasticard to the bottom of the hatch.

Turret

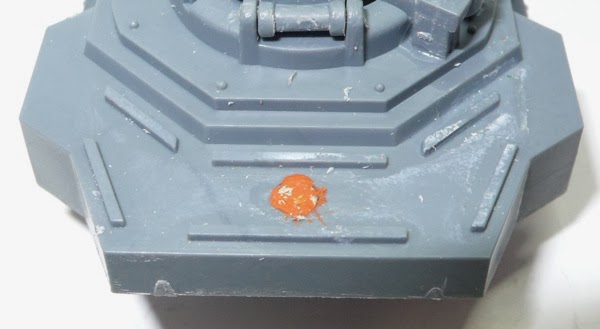
I assembled the tank commander and sawed off the sides so it could fit in the turret. I then pierced two holes in the base and glued magnets in there. I put a dab of paint on both magnets (Macharius Solar Orange, as it's nicely thick and bright), and gently pressed the commander in the hatch. With that done I had nice dots on the plasticard. Two more holes through the dots and I had magnets glued in place.
Commander

Then it was time for the main guns. One magnet in the base, a spot of paint again, and I pressed all three main guns in turn against it (note that I filled the hole in the base of the Punisher cannon with green stuff first).

Main gun

So now I had 3 magnetised main guns:

3 main guns

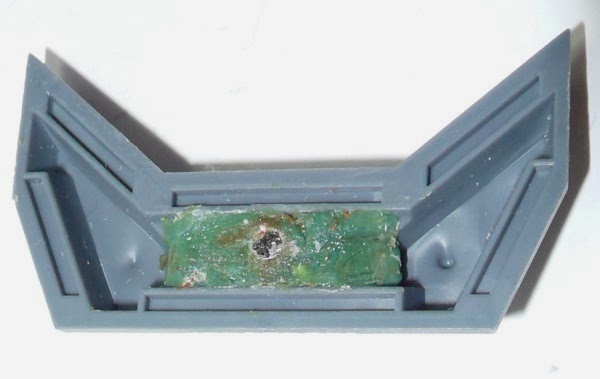
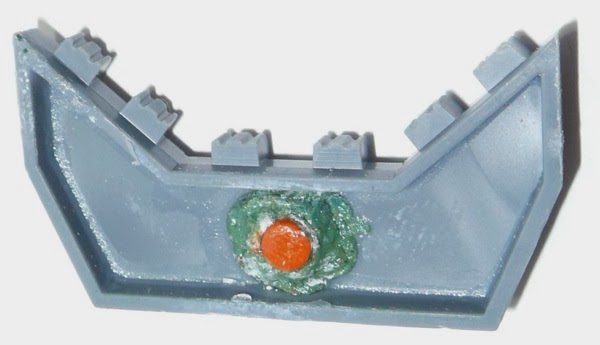
It was time to deal with the rear of the turret - same story as before, holes, paint and green stuff:

Rear of the turret

Rear of turret

(note the magnet used above is a 2 x 1mm disc)

Rear of turret

Here is the result:

Result

December 08, 2009

Magnetised Screaming Bell - part 6 - oopsie

One last bit to magnetise - should be easy with a couple of 1 x 2 mm magnets on the arch, and .4 x 2 mm ones on the piece.

P1020952.png

Now onto the oopsie:

P1020956.png

Ah well, I'll just have to do a bit more sawing and sculpting to fix this.

December 07, 2009

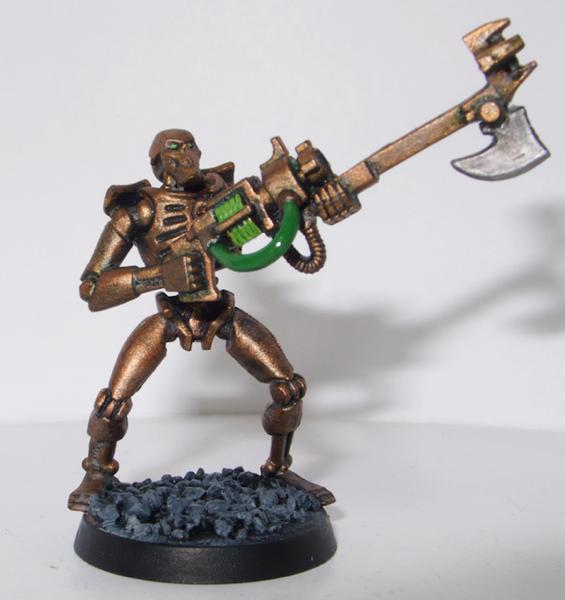
Speedy bronzy warriors

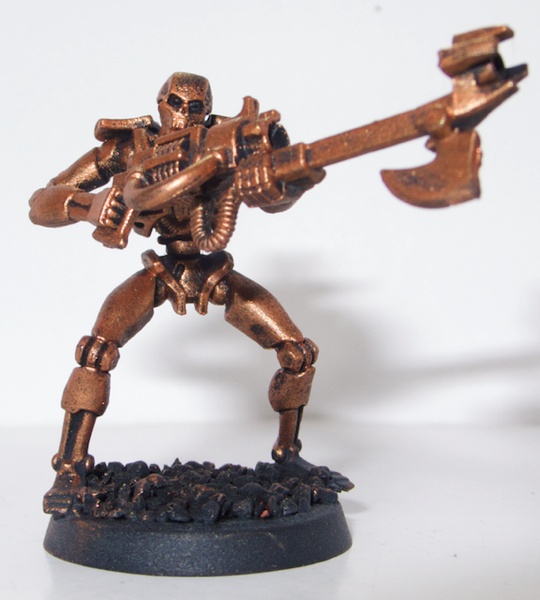
I’ve had a bunch of warriors with me for a while (28 from a battleforce), and wanted to paint them relatively quickly. So - post assembly, I followed the below steps, doing all 28 at a time for any given step (note: the pics are not all of the same mini).

Step 1 - black undercoat (Chaos Black Spray).

Step 1

Step 2: dwarf bronze drybrush. No need to be subtle here, as the entire model needs to be painted, so the Citadel Large Drybrush did the trick nicely.

Step 2

Step 3: Thraka Green wash with the Citadel Wash Brush. Again, going all over the model.

Step 4: Boltgun Metal over the blade (Citadel Standard Brush).

Step 5: Mithril Silver over the edge of the blade (Citadel Detail Brush).

Step 6: Badab Black wash over the blade (Citadel Wash Brush).

Step 7: Snot Green over the gun’s tube (Citadel Standard Brush).

Step 8: Cover the base with diluted Chaos Black to hide the bronze (Citadel Basecoat Brush).

Step 9: drybrush of Fortress Grey over the base (Citadel Medium Drybrush).

Steps 3-9

Step 10: a lighter drybrush of Bone White over the base (Citadel Medium Drybrush).

Step 11: coat of Chaos Black on the side of the base (Citadel Basecoat Brush).

Steps 10-11

Step 12: Scorpion Green over the gun (Citadel Detail Brush).

Step 13: A dot of Scorpion Green over each eye (Citadel Fine Detail Brush).

Steps 12-13

Close-up…

Close-up

Step 14: wash of Thraka Green over the gun’s Scorpion Green (Citadel Wash Brush).

Step 15: Gloss varnish over the gun’s tube (Vallejo Model Color).

Step 16: Matt varnish over the rest of the mini (Vallejo Model Color), ignoring the base (can’t be bothered).

Steps 14-16

Step 17: Once all dry, glue the gauss rods in place (using PVA glue and an old brush).

Step 17 (finished)

Et voilà.

September 23, 2009

Bastion (a work in progress)

So I’ve started on my bastions. Progress is very slow but hey, I’ve been on holiday…The bolters: I pierced the tip of the guns first, then undercoated Chaos Black, drybrushed Boltgun Metal, and washed with Badab Black. The tip of the guns were further washed with Devlan Mud, then Badab Black again. Then varnished with Vallejo Matt Varnish.

Heavy Bolter

The gun turrets: Chaos Black undercoat, Boltgun Metal drybrush, and Badab Black wash. Added a bit of detail on the skulls, then Matt Varnish.

Gun turret

Bastion stage one – undercoat of Chaos Black and 2 coats of Catachan Green.

Bastion

Bastion stage two – added a drybrush of Camo Green.

Bastion

Bastion stage three – added a wash with Badab Black. Then sealed with Purity Seal.

Bastion

As I said, it’s in progress… I’ve only completed one section yet.