November 04, 2014

New Anarchy Models Kickstarter!

So the Summer Of Gaming Outside is over (had a good few games in the garden and tremendous fun, lost all of them but the final one, yes I’ll post about them someday).

In the meantime, Brian from Anarchy Models is at it again! With flexible, washable, semi-transparent and fully re-usable stencils for airbrushing! The project is already funded, and we’re now into ‘more stencils and freebies’ territory as the overall funding increases.

The campaign is over here, and update #2 has a nice demo of the stuff.


June 15, 2014

Filla-Glu's Powda and Wicking glue

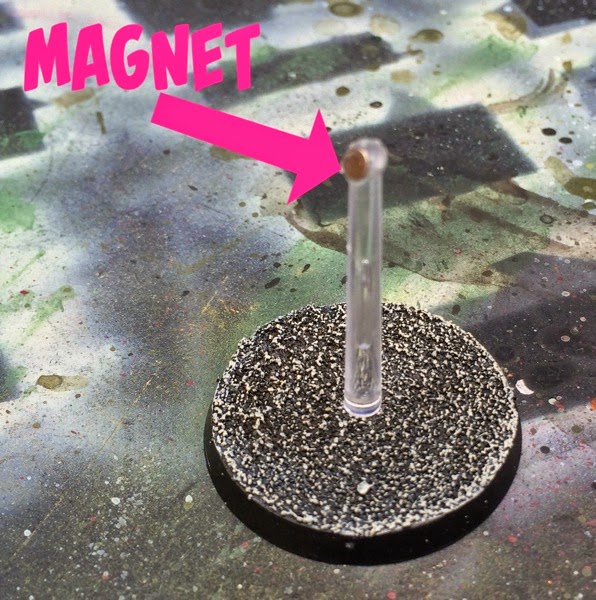
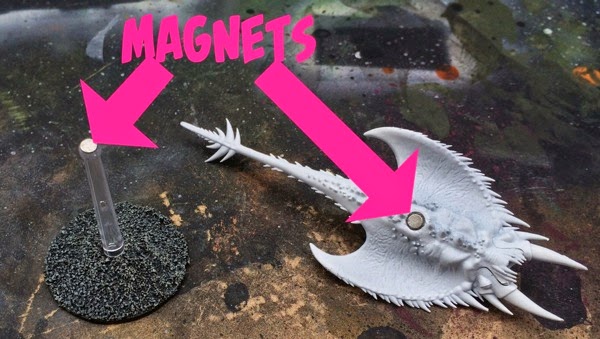
Still no battle reports, I know… I did have a game planned for today, but the weather was quite dodgy this morning so, being cautious and all, we decided to cancel. In the end it did not rain in the afternoon, and I managed to squeeze in a bit of hobby. Among other things, I magnetised my canoptek acanthrites (still a work in progress, paint-wise) and my recently acquired Screamers of Tzeentch to their bases. The goal being for them to be easier to store. Plus, magnets.

As these models have balltop flying stems on their bases, and so nice large holes on the models themselves, I decided to have a go with Filla-Glu’s Powder and Wicking glue kit.

Filla-Glu

It’s all quite simple. Below is an acanthrite, with the hole for the base’s stem in its chest. 

2014-06-15 17.20.22 HDR.jpeg

 Step 1: pour the powder into the hole.

2014-06-15 17.20.37 HDR.jpeg

 Step 2: push the magnet in. It’s powder, so it’s easy to push it in.

2014-06-15 17.21.06 HDR.jpeg

Step 3: add a drop of wicking glue. The stuff is super thin, and binds everything together instantly. 

2014-06-15 17.21.23 HDR.jpeg

Step 4: use regular super glue to add a magnet to the base. I flattened the stems first (using a Dremel because I am lazy, but clippers and files should do just as well). The one below is slanted, as an horizontal one resulted in a seriously nose-diving acanthrite.

The base

 Finished!

Finished

And here is the same on a screamer: 

2014-06-15 17.24.53 HDR.jpeg

2014-06-15 17.25.01 HDR.jpeg

June 02, 2014

Updated objective markers

I do have a number of stories on how I’ve been smashed by all comers recently – be they Eldar, CSM or Tau, but this will have to wait for a bit. In the meantime, I have updated my objective counters for 7th edition. A quick preview is below, and they can be found here. Previous notes on the topic are here, here and here, but in summary:

As I wasn't entirely convinced by GW’s Munitorum battlefield objectives, I built some. They're large (40mm), and have the effects written on them. Download the file, print the sheet (important: print at 100%, do not scale), cut and glue onto 40mm bases (I use the plywood ones from Fenris Games), and you're set. They're not fancy but should do the trick.

Nick from IDICBeer posted a video on YouTube about them.

Warhammer 40K 7th edition objective markers

May 21, 2014

Evil and fluffy thoughts

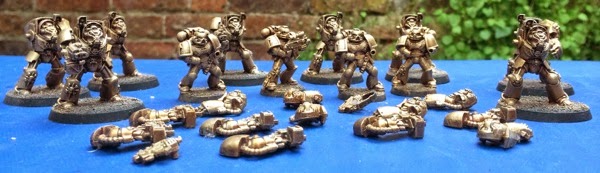
I don’t know about you, but even though I do not play them, I’ve accumulated quite a lot of Space Marines over the years. Never let good minis go to waste though, and with the release of the fall of Orpheus last year, I came up with a cunning plan: my Necrons, having triumphed over the Minotaurs, have now enslaved them (thank you, mindshackle scarabs), and use them as a meat shield when going to battle. All of this to be done during Apocalypse games, of course.

So last winter, when all was grim and dark outside, I started painting some minis. I did not go very far, but the intent was there.

Minotaurs

Now with the new rules coming out on Saturday, I might go a bit further. I don’t know about yours, but my Necron are nothing if not pragmatic. We don’t have psykers, but the Space Marines certainly do. And what does it matter if they die horribly? So, I think I’ll add some librarians to the fold, and when in battle convince them nicely of giving themselves to possession. Whether or not they perish while trying to summon a daemon, I see it all as a win.

Plus, it should be fun painting a few daemons after all that metal…

May 11, 2014

Blast that weather

So the weekend wasn’t great weather-wise, what with the rain on Saturday and the excessive wind on Sunday. No airbrushing then, but I did manage to do a bit of work.

Deathmarks, finished last Monday:

Deathmarks

My first cryptek. Not sure I like what I’ve done with it, but it will have to do.

Cryptek

And that guy’s been happening:

C'tan


May 05, 2014

Starting with the airbrush - Anarchy Model's stencils

Last week I attended an all-day airbrush training session, organised by the good folks at SnM Stuff and taught by airbrush maestro Brian Best from Anarchy Models. The morning was spent on the basics: how to set things up, what to do and what not to do. It became very clear very quickly that practice, and lots of it, is the way forward. The afternoon concentrated on using Brian’s stencils.

Forward one week, and as the weather was nice outside it was time to train some more (for reasons that I do not pretend to fully understand, the practice of airbrushing inside the house is frowned upon by my lovely wife).

I could have done some more basic training painting dots and lines, but that’s boring and I went straight to the stencils (very important note: I do need to do the dots and lines exercices, many times over!).

I happen to own a number of Imperial Guard tanks, which I’ve never painted. The trouble was, I’d decided a long time ago that I wanted to use an urban camouflage pattern on them, however I never had the energy to deal with all the tape handling (or manual stencil cutting) this would have required. Skip a few years, and Brian does his stencils KickStarter. I had no excuse anymore.

 I picked the shattered stencil, and got started on some bits from my super-heavies. I wanted to check the quality of the stencil, especially how well it would stretch and stick around detail - can you say rivets?

I am a lazy git, so my scheme will be 3 colours only: black, grey (Vallejo US Grey) and light grey (Vallejo USAF Light Grey).

Below is what I did:

Step 0 - airbrush black primer on all the parts (they had already been primed with Games Workshop’s Chaos Black spray, but as I expected to have to do retouching down the line, I wanted to make sure to be able to match the blacks).

Step 1 - place the small-sized stencils on the parts. The idea is that what’s covered will end up being black in the finished model. I made sure I half-covered some rivets and aquilas with the stencils, again to check the stencil’s quality and the potential bleed. Brian’s tip: use your thumbs to press the stencils down firmly. Brian has the strength of Hercules in his thumbs. I don’t, but I did try hard. It will become very clear that the more care is taken at this stage, the better the final result will be.

(note: after a first try, where the parts flew all over the place under the airbrush’s air pressure, I had another go, this time with everything Blu-tacked to the board)

Step 1

 Step 2 - airbrush the first grey, basecoat style. No subtlety here.

Step 2

Step 3 - after the paint has dried, stick on the large-sized stencils on. It’s fine to overlap on the previous ones. Again, make sure all are pressed down firmly. I must admit I wasn’t as careful this time as I was in step 1.

Step 3

 Step 4 - airbrush all again, this time using the light grey.

Step 4

Step 5 - once dry, remove the stencils carefully, and admire the results. 

Step 5

So, how did it all go? Well, not bad at all. As I’ve mentioned above, it is essential to take care when applying the stencils but it you take the time, the results rock: just look at the details below, all without unsightly bleed (note the picture is a bit crappy as I had to enlarge it).
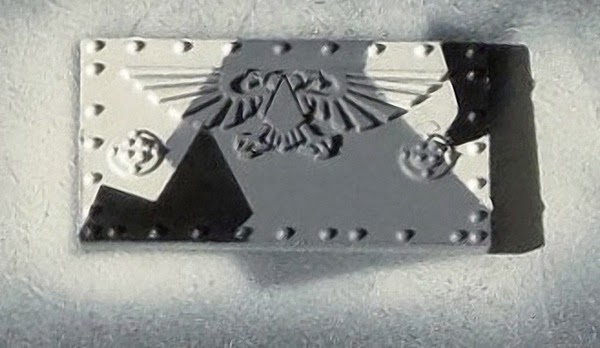
Detail 3

 This one shows how it all works nicely, even with the stencils’ border running across rivets: 

Detail 2b

If, however, the stencils are not stuck carefully enough, or allowed to kink, this is what happens:

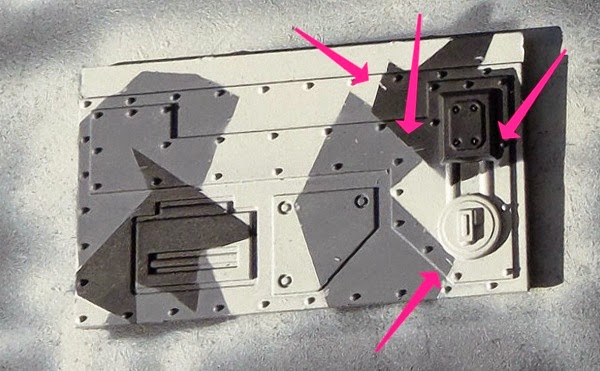
A

Detail 4

 Not a major issue (and certainly one entirely of my own doing); a few quick patches with a regular paintbrush should sort these out.

Here is a quick look at the result so far:

Tank

And in final news, I currently have a non functioning airbrush, which will happily blow air but no paint. No idea what’s wrong. I have been told that taking a hammer to it is not the wisest course of action, but it might yet come to that.

April 11, 2014

Leigh and the Insaneorium

 Leigh, he of recent Apocalypse “Red Mist” fame, has started a blog at The Insaneorium, where he unashamedly exposes to all comers how far off he’s gone. If you want to see what extreme hobby can do to you, or your loved ones, go have a look before the men in black catch up and it all gets disappeared. You have been warned.

And in other new, tomorrow is Salute, and so it is time to get the orange shirt out again…