So it's been a while, I have been busy and did not find the time to blog. There's a super heavy in the making (magnetised as per usual). Below is another work in progress – 3 sentinels, fully magnetised, getting prepped for their undercoat. And when I get time, I will post details.

June 20, 2010


April 08, 2010
They're here
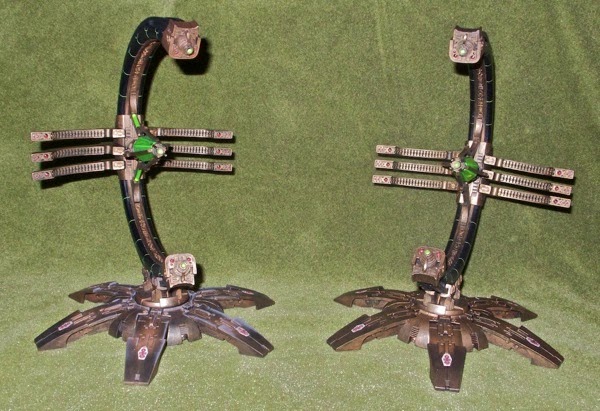
At long last, they're done. Well, still need a couple of touch-ups on the second one, but they're good to play. More comments later.
December 28, 2009
Magnetised Screaming Bell - Part 5 - nearly done
A this stage we're close to completion.Here are the bell / furnace's bare bones:

Here are the various components:

Here is how the Rat Ogre and Plague Monks' chains fit:


The Plague Furnace:
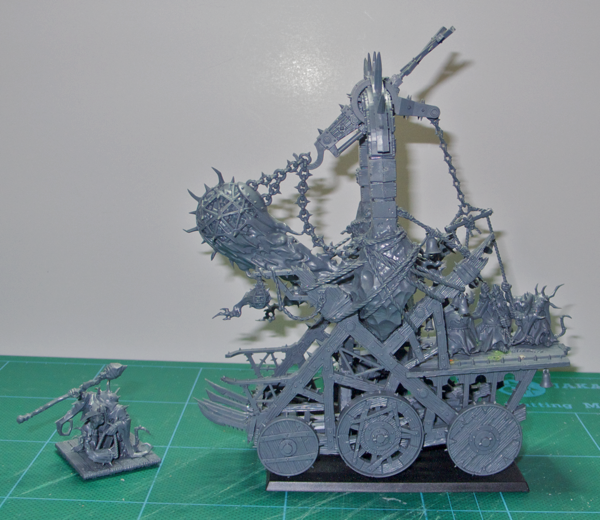
The Screaming Bell:

Onto the next post for what remains to be done, and a tiny problem with the Grey Seer's hand.
Magnetised Screaming Bell - Part 4 - the front platform
No pictures for that one - the front platform will be glued in (I haven't done so yet as I want to paint each part of the bell / furnace separately). You just need to drill a hole into the platform, insert a single 1 x 2 mm magnet in there, and then add magnets to the bottom of Plague Monk and the brasier.
Magnetised Screaming Bell - Part 3 - the rear platform
Now it's time to magnetise the rear platform.
Step 17- glue 6 2 x 0.4mm magnets onto the sides of the bell / furnace.

Step 18: put a dab of paint on each magnet, then press the rear platform onto them. You will want to do this for each side of the platform.


Step 19: drill shallow holes on the 12 spots, and glue a 2 x 0.4mm magnet in each hollow. Again make sure you get the side of the magnets right.
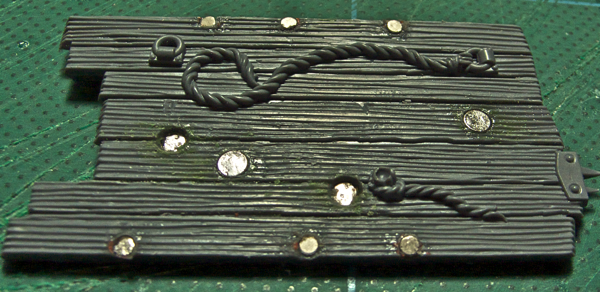

Step 20: put some green stuff onto the holes which are in deep enough, and try and recreate the wood aspect.

Magnetised Screaming Bell - Part 2 - Bell and Furnace
Now we're getting serious. The axle for the bell / furnace is completely removed, and replaced with 6 magnets (all 1/8" x 1/16" discs). Here is the detail:
Step 7 - glue a magnet in each half-arch's hole. You will need to make the hole a tiny bit larger, a round file comes in handy here.
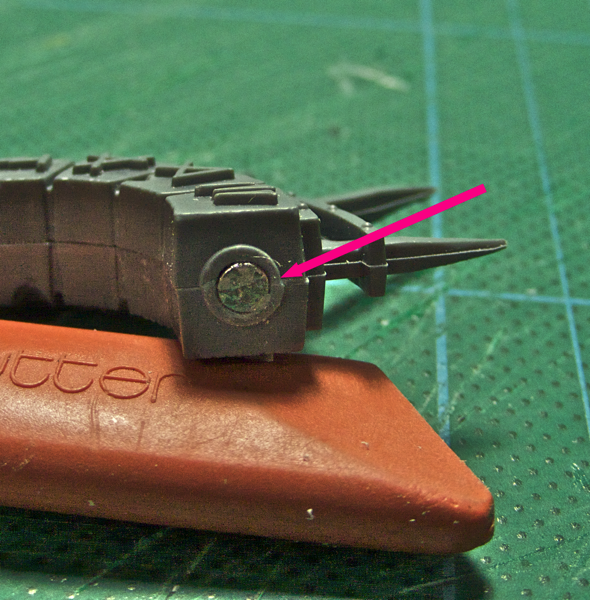
Step 8 - making sure you're not getting the side wrong (a dry-fit is essential at this stage), put a magnet in each part of the yoke. Note in the pictures below which side to be flush with.

Step 9 - saw the bottom axle off and replace with two 1 x 2 mm discs (green arrow). Again make sure you get the magnets' sides right.

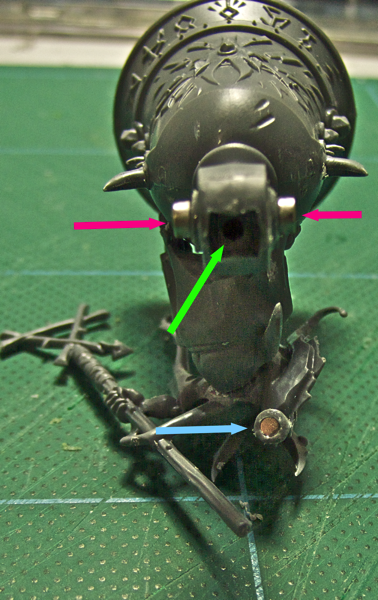
Steps 10, 11 and 12: glue two 1/8" x 1/16" magnets to either side of the bell's axle, having sawn the axle off first (pink arrows at the top). Drill a hole into the bell's top and insert a 1 x 2 mm magnet (green arrow). Finally, drill a hole in the Grey Seer's arm and insert a 2 x 0.4mm magnet in there (blue arrow at the bottom).
Step 13: drill a hole in the Grey Seer's hand and insert a 2 x 0.4mm magnet.
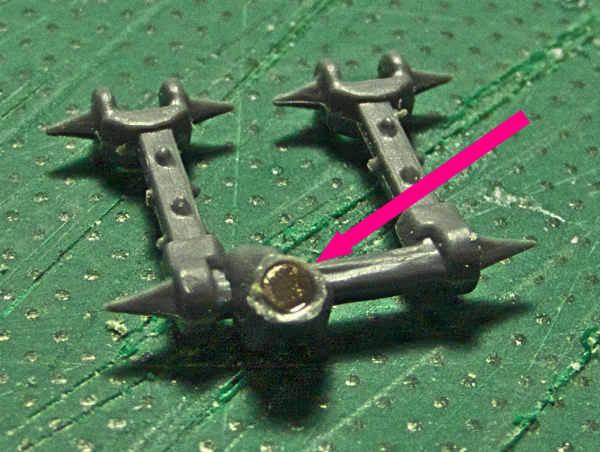
Step 14: drill a hole into the ornament and insert a 1 x 2 mm magnet.

Steps 15 and 16: glue two 1/8" x 1/16" magnets to either side of the furnace's axle, having sawn the axle off first (only one is shown on the picture, there is one on the other side, pink arrow at the top). Drill a hole into the furnace's top and insert a 1 x 2 mm magnet (green arrow).

Now we're getting serious. The axle for the bell / furnace is completely removed, and replaced with 6 magnets (all 1/8" x 1/16" discs). Here is the detail:
Step 7 - glue a magnet in each half-arch's hole. You will need to make the hole a tiny bit larger, a round file comes in handy here.
.sandvox/P1020933%20-%20Version%202%20copy.png "This image is a placeholder. Drag a new media file here to replace it.")
Step 8 - making sure you're not getting the side wrong (a dry-fit is essential at this stage), put a magnet in each part of the yoke. Note in the pictures below which side to be flush with.
.sandvox/P1020927%20-%20Version%202%20copy.png "This image is a placeholder. Drag a new media file here to replace it.")
Step 9 - saw the bottom axle off and replace with two 1 x 2 mm discs (green arrow). Again make sure you get the magnets' sides right.
.sandvox/P1020928%20-%20Version%202%20copy.png "This image is a placeholder. Drag a new media file here to replace it.")
Steps 10, 11 and 12: glue two 1/8" x 1/16" magnets to either side of the bell's axle, having sawn the axle off first (pink arrows at the top). Drill a hole into the bell's top and insert a 1 x 2 mm magnet (green arrow). Finally, drill a hole in the Grey Seer's arm and insert a 2 x 0.4mm magnet in there (blue arrow at the bottom).
.sandvox/P1020926%20-%20Version%202%20copy.png "This image is a placeholder. Drag a new media file here to replace it.")
Step 13: drill a hole in the Grey Seer's hand and insert a 2 x 0.4mm magnet.
.sandvox/P1020929%20-%20Version%202%20copy.png "This image is a placeholder. Drag a new media file here to replace it.")
Step 14: drill a hole into the ornament and insert a 1 x 2 mm magnet.
.sandvox/P1020931%20-%20Version%202%20copy.png "This image is a placeholder. Drag a new media file here to replace it.")
Steps 15 and 16: glue two 1/8" x 1/16" magnets to either side of the furnace's axle, having sawn the axle off first (only one is shown on the picture, there is one on the other side, pink arrow at the top). Drill a hole into the furnace's top and insert a 1 x 2 mm magnet (green arrow).
.sandvox/P1020935%20-%20Version%202%20copy.png "This image is a placeholder. Drag a new media file here to replace it.")
Magnetised Screaming Bell - part 7 - finished
I fixed the oopsie:
First sawed the handle,

Added a bit of brass rod,

Verified that it fits,

Green suffed it.

Final bit:
Dug two grooves with the knife,


Added magnets and glued and green stuffed them (they're the smallest ones, 0.4 mm),

Added magnets to the pillar.

And now onto painting.
Subscribe to:
Posts (Atom)