Showing posts with label Pylon. Show all posts

March 23, 2014

A relaxed Apocalypse

Yesterday was Military in Miniature - Military Modelling & Wargames Show in Guildford. I have attended the show for the past couple of years, running small 40k demo games with friends. This year I was supposed to help by working the door for a change. So I was just a little bit surprised when I got instead asked on the Friday evening to help run a 40k demo game the following morning. Not to worry, my co-demonstrator Leigh and I quickly agreed on a Necron vs. Chaos Daemons 5,000 points Apocalypse game. At which point I went to bed, as the work week had (once again) been interesting.

(As I have been painting a couple of Transcendent C’tans recently, I briefly entertained the idea of finishing one, as one really ought to do the night before a big game. Unfortunately my army is all in the Shed of Hobby at the back of the garden, and just then it started hailing like mad. The Transcendent C’tan was not to be.)

6AM on Saturday found me building up a list in Army Builder. I went with a variety ForgeWorld models, as the point was to get people to come and talk to us rather than play a sensible army. After a trip to the Shed I ended up with 5,010 points of Necron goodness:

  • 3 Gauss Pylons
  • 3 x 10 Immortals in a Night Scythe
  • 1 Triarch Stalker with Heat Ray
  • 5 Deathmarks
  • 1 Destroyer Lord with all the trimmings
  • 1 Overlord with all the trimmings in a Catacomb Command Barge
  • 1 Doom Scythe
  • 1 Canoptek Tomb Sentinel
  • 2 Canoptek Tomb Stalkers
  • 2 x 5 Canoptek Wraiths with Whip Coils
  • 1 Tesseract Ark
  • 1 Night Shroud Bomber
  • 2 x 5 Destroyers, 2 x 2 of which Heavy Destroyers 
I arrived a little bit before Leigh and set up the terrain. An Imperial industrial city having seen heavy fighting would provide plenty of cover (not that it matters that much with Strength D weapons).
 
The battlescape
Look at all those nice buildings that have gone boom…

Leigh, true to form, arrived with 5 models only (but what models!):

  • Aetaos’rau’keres, Daemon Lord of Tzeentch
  • An’ggrath The Unbound, Daemon Lord of Khorne
  • Scabeiathrax The Bloated, Daemon Lord of Nurgle
  • Zarakynel, Daemon Lord of Slaanesh
  • and a Chaos Reaver Battle Titan to round things up (see some pics here)
Total: 4,780 points.

At this stage there is a little bit of a point imbalance. However (and I only just realised this while typing this note) I completely forgot that I had put a Doom Scythe in the list and so it never even left its box. Down to 4,835 points for the Necron, now we’re even.

What a bunch of jokers we all are

What a bunch of jokers we all are

The game was a blast. We kept things straightforward, with no finest hour, strategic assets or unnatural disasters. We’re simple folks, Leigh and I. I hadn’t played with the new rules before, but my initial impressions from reading them were confirmed: it’s brutal. Strength D is now horrifically powerful. 

So, a few notes:

Turn 1

I deployed little, as most of my army could deep strike or outflank. I won the roll and started first.

Deployment

After deployment

The very first casualty was the Tesseract Ark. As I realised that I had not brought the rules with me, back into the box it went. D’oh.

The Triarch Stalker was deployed inside difficult terrain, and would spend the next five turns progressing veeery slowly towards the centre of the board. I am grateful to Leigh for paying token attention to it by targeting it as part of an Apocalyptic barrage. It lost two hull points and can at least claim to have seen some action.

The Pylons did their work, blasting off the Reaver’s void shields and starting to take down Hull Points (I have played with the previous Apocalypse rules for too long: I’ve just only realised that I could have deep struck a bunch of Strategic Reserve models close to the Reaver on Turn 1 and killed its void shields with them instead of having to waste strength D shots on the task. Oh well, live and learn, at least I did do that from Turn 2).

Turn 2

I was a bit worried about those four Daemon Lords trudging across the board, but then Leigh gave me Christmas in early spring: An’ggrath The Unbound, Guardian of the Throne of Skulls, Most Favoured of Khorne, Lord of Bloodthirsters, The Deathbringer, took flight. A quick shoot with a Pylon resulted in three hits. I rolled the dice of the Destroyer Weapon Attack Table: with two sixes, An’ggrath (7 wounds) was already dead.
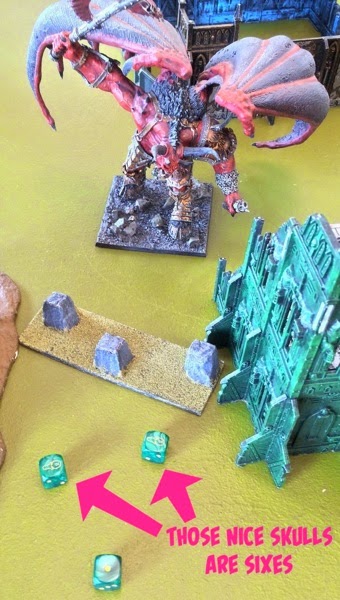
An’ggrath The Unbound does not like what he sees

An’ggrath The Unbound realises he should not have taken to the skies

Leigh did insist for me to roll fully for damage and so it is that, having suffered 22 wounds, An’ggrath got to add ‘The Red Mist’ to its long list of titles.

That would all add up to 22 wounds

2D6 + 12 wounds…

I had never played with the Outflank rule before, and I was quite excited to see that Leigh had deployed his Big Bird close to a table side. With my Canoptek Tomb Sentinel and Stalkers able to re-roll the die if the results did not suit, I was quite confident that I’d get where I wanted to be. Which I did. Only to learn that one cannot charge when arriving from Reserve anymore. Bother.

I was also soon to learn that the Tomb Stalkers and Sentinels are definitely not equipped to engage Greater Daemons. They went very squish very fast. Those extra D3 attacks for the Stalkers are only granted when outnumbered. Well Big Bird is very scary, but there is still only one of him (thank the Gods!).

Turn 3

Leigh had by now blasted 2 Pylons, with a single one remaining with a single Hull Point. I got lucky dice however, and managed to finished the Reaver before it got me.

I also deep-struck everything I had left, with no mishaps apart from the Deathmarks, which only got delayed.

I managed to engage Zarakynel with a unit of Canoptek Wraiths. Leigh started grinding his teeth as the whip coils moved Zarakynel’s Initiative from 10 down to 1. The Canoptek Wraiths remain a powerful assault unit, even against a Daemon Lord. They managed to keep Zarakynel engaged long enough to allow the Destroyer Lord to assault as well in turn 4. It took a while (and the second unit of Canoptek Wraiths), but Zarakynel, by now joined by Scabeiathrax (who had been barely slowed down by an outflanking Canoptek Tomb Stalker), finally went down.

Turns 4 and 5

The remaining Pylon pulverised Aetaos’rau’keres (a.k.a. Big Bird), with 12 Wounds inflicted in one turn. Mind you, I also had every other available unit ready to shoot at it: 2 units of Destroyers, the Deathmarks and 2 Night Scythes. Not that all of them combined would have done it much harm, but at least they were ready to try.

After 4 turns of trying to fly over one of the daemons, the Night Shroud Bomber finality passed over an unengaged Scabeiathrax and did a bombing run. Which is when I discovered that bombs always scatter, and so are not much use against a single creature. Scabeiathrax escaped unscathed.

We stopped after Turn 5 as the show was closing down and it was time to pack and help clean up. Only Scabeiathrax was left on the Chaos Daemons’ side, engaged in combat with the last unit of Canoptek Wraiths, the Destroyer Lord and the Overlord. If he happened to win the assault he then let himself wide open to 3 shots of Strength D from the remaining Pylon, so Leigh declared a Necron victory.

Final assault

I had lost very little in all: 2 Pylons, 2 Destroyers, the Catacomb Command Barge, and 8 Canoptek Wraiths. It does say something about both Leigh and me that I never bothered to disembark the Immortals, and he did not want to deploy his cultist meat shield around his Reaver (which would have been useful for trying to assault the Destroyers that kept its void shields down from Turn 2). Puny minis are not for us, at least in Apocalypse.

The end

The state of things at the end of Turn 5

And now for the Triarch Stalker, which I voted the lamest unit of the game (then again, my fault for deploying it in a stupid location in the first place):

Blasted Stalker

Do take your time…

The Hull Point markers are from Laser Cut Card.

So in conclusion:

  • Strength D is horrible. Try to quickly kill anything that wields it
  • So are the Canoptek Wraiths. Shoot them before they can assault
  • These Greater Daemons are certainly no picnic. Without Strength D there was no hope for the Necrons

It was a good game, with a very sporting adversary. The show itself was super cool, with plenty of traders, demos and a great painting competition. The atmosphere was very friendly, with a good number of (well-behaved!) children. In the words of one of the most famous robots of all: "I’ll be back”.


August 27, 2012

ApocaFez Summer 2012


So last Sunday was this year's summer edition of ApocaFez. We have that one at the local club, and it's typically a bit smaller than the winter one at Warhammer World. Still…
We did not count the points - the agreement was that the players would bring in whatever they could play - and if they started to lag behind, their extra stuff would simply be blown up from orbit! Thankfully it did not come to that.
The Imperium, I am afraid, did get properly trounced this time. Each team scored 1/10th of a point per vehicle destroyed / structure point removed. On top of this, there were 5 objectives (secretly marked from 0 to 4). The xenos did score rather well on both.


The thing to remember for me is definitely the awesomeness that are the pylons. Usually us xenos dread turns 2 and 3, when the Imperium bring in their numerous flyers and start wreaking havoc and disgorging troops. The new skyfire interceptor rules put an end to all that, in quite a definite way.

As per before, a number of pics can be found on Flickr.


July 19, 2011

Pylon - assembling the cannon

 
Onto the final assembly stages.
 
(note: the part names I use below all come from the pylon assembly document which Forgeworld kindly provides with the kit)
 
Fist, glue the main crystal clamps to the gun rail. So far so easy.
 
 
Then glue the cannon to the gun rail. You'll notice a gap between the clamps and the cannon. Do not try and glue them as is – with the tension all you'll get is parts separating again promptly. Rather, use the resin worker's best friend: the hair dryer. A few quick passes over the clamps and they'll be soft enough that they can be bent into placed and glued.
 
 
Maintain them in place while they cool down (it doesn't take very long). Presto, a strong joint.


(note: be gentle with the hair dryer, you don't want to melt the resin. The bottom of the clamp has a hollow where the green plastic rod goes - this is quite a thin part and can easily collapse on itself.)
 
Onto the cannon muzzle. As you'll see below, the thing does not fit nicely onto the crystal.
 
 
Back to the hair dryer it is. You'll have to hold the muzzle if you don't want it to get blown halfway across the room. Unfortunately the hair dryer expels rather hot air. I've found that holding the piece to warm up between two layers of kitchen roll will keep your fingers nicely cool.
 
 
Again the above advice applies: don't overuse the dryer! Better to do several passes until the muzzle is flexible enough to fit onto the crystal, using gentle pressure. Just maintain it in place until it's cold, then glue it on.
 

For the last part, the side crystal clamps, follow the same process as before. They will likely be too short, a gentle spot of warming (again, use kitchen towels to hold them) will ensure they glue in nicely.
 
 
And that's it. The pylon assembly is complete.
 
One last tip: the turntable will likely be loose inside the base centre, resulting in a leaning pylon. Just stick Scotch tape onto the turntable until you get a good fit. The tape is thin enough that you can get quite precise results. I would not advocate using thicker tape here (like electrical tape).


April 21, 2011

Pylon – fixing the focussing array

The focussing array is them six "whiskers". I have tried a number of methods for fixing them.

For the first pylon I built, I went with magnets (two per). Unfortunately, they were not that strong and I ended up with some droopy whiskers. So at the last moment I added a pin (that's the whisker to the left below). For the second pylon, I went with two pins and no magnets (right, below). This one makes for a sturdy link, however each time I put the whiskers on I'm a bit concerned that I'll damage the holes.

First try (left) vs. second try (right)
 
 First try (bottom) vs. second try (top)
 
 First try - 2 magnets and a hole
 
Second try - 2 holes


For the third pylon, I decided to go back to magnets – because if I can't magnetise something, I get that very annoying feeling that I've failed somehow. This time around however, I went with rod magnets (1/8" x 1/4"), so I get the benefits of pins as well. So far, so good…

Rod magnet, half-sunk into the whisker
 
 There are magnets inside the holes - these ones are 1/8" x 1/16".

April 17, 2011

Pylon - assembling the axle

There are 3 parts to fit together. They have all been primed with Chaos Black, followed by a dry brush of Dwarf Bronze, and a light wash of Thraka Green.
 
So one of these:
 
 
And two of those:
 
 
First, I removed the extra paint so the glue bonds to the resin, and not the paint. A Dremel with appropriate bits helped here. An added advantage is that I got a rough surface, which makes for a stronger joint.
For an earlier pylon, I'd used blu-tack to mask the parts I did not want to paint, that works too.


The glue goes in the axle's groves, and the guides get prepped with a primer/accelerator (I use Filla-Glu and their very convenient Kicka-Pen).
 
 
In order not to get nasty surprises during the final assembly, I fit the pylon onto the axle while the glue dried.
 
 
One final note on pinning: tempting as it might be, do not pin. On an earlier pylon, I pinned where the arrows are in the picture below. All I got was a weaker piece, which snapped in two during my first game with it. I've stuck with just glue since, and haven't had a single problem.
 

April 09, 2011

Pylon progress

So yes, it's been a while, but at long last I've been making progress. The thing with pylons is, they're big. If you want to take them with you, you pretty much have to go flat-packed. Like so:

 
So what I've done is cut the tip of the pylon with a hacksaw, drilled some holes, and glued magnets in (in this case they're 3x2mm, ensuring a nice powerful fit).
 

On the pylon side, I drilled 3 roughly equidistant holes, glued the magnets in, waited for everything to dry, and then added a spot of paint on top of the magnets. I pressed the other part while the paint was wet, which gave me the place to drill…

 … I then drilled where the paint was, put on more magnets (taking care I got the polarity right), and here we are:

 
Here is the result, on one of my older pylons (I've managed a tighter fit this time around):


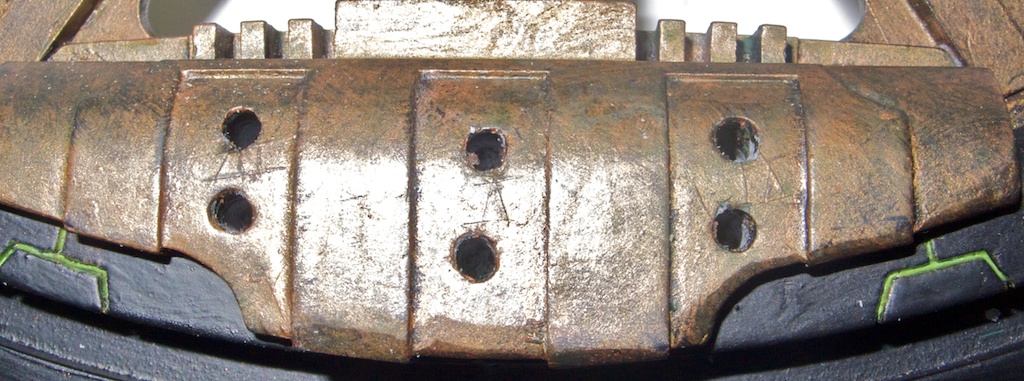
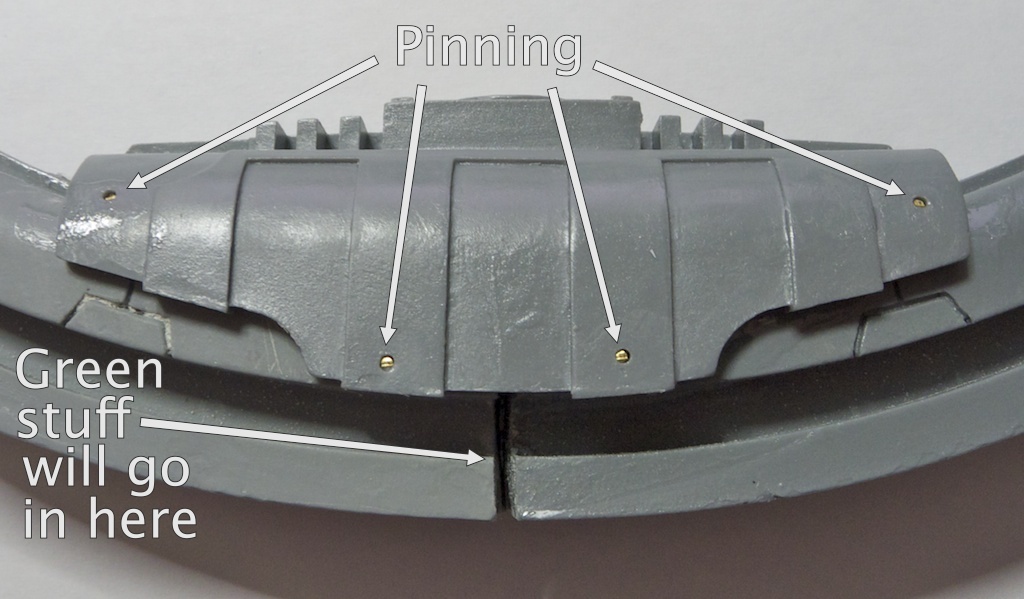
 While I was at it, I assembled the centre of the pylon: glued the 3 parts together, then added 1mm brass rod in 4 places. The rod is not flush, the idea is to fill the hole with a bit of green stuff. It was quick to do, and ensures the thing will not break apart. The joint in the middle will be filled with green stuff as well - easier than spending time trying to get the two parts fit exactly.

February 27, 2011

Back to the pylon

So it's been a long while, but at long last I'm back with the pylon. First step is to build the base. I've pinned the legs, using a cunningly crafted template to ensure the holes match on both sides. It certainly helps speeding things up too, as this needs to be repeated for all 6 legs.
One side of the template is marked 'hub', the other 'rim', to help ensure I don't drill the holes the wrong way around. An alternate method would be to drill the guiding holes in the exact centre of the template, but I could not be bothered.


The leg side of things:


And that's all for now.

December 28, 2010

Pylon

To get us started, I'll try to document my building of a Necron pylon. First things first: you'll need to verify you've got all the bits in the kit, clean the pieces using cold soapy water, straighten any bended bits with warm water, and remove the extra bits of resin, using a combination of saw, Dremel, and sand paper (usual warnings apply: resin is toxic, wear a mask and protect your eyes). In the pictures below I've marked in purple all the bits to be removed. Note: I start with the cleaning and then do the sanding, and have not had any issues with peeling paint. Others will prefer to sand first and clean later.


April 08, 2010

They're here

At long last, they're done. Well, still need a couple of touch-ups on the second one, but they're good to play. More comments later.

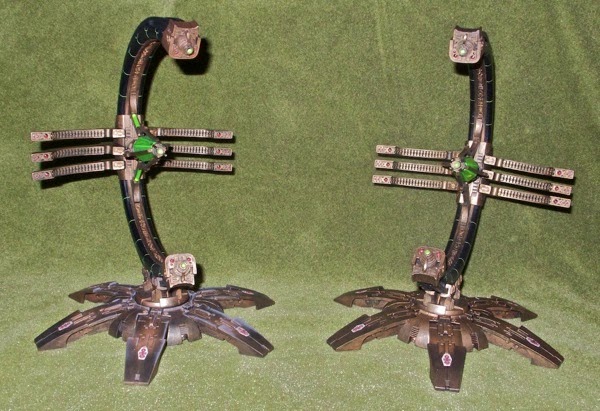
2 pylons